Caterpillar Cocoon

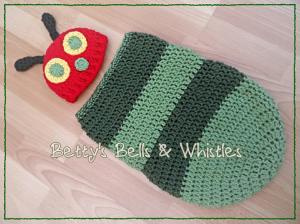
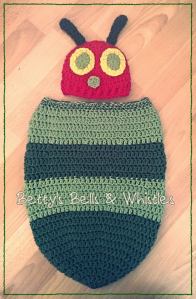
I was asked to make a Caterpillar Cocoon months ago and searched high and low for a (free) pattern that would work with the chunky yarn (stylecraft special) I had bought and had the ridges of a cocoon rather than just straight edges. I bit the bullet and set about designing my own pattern. Eek! It took a few goes to get the increase and decrease rows right so they could be seen but weren’t going to be tight or uncomfortable for a baby. I so wish I had made these for my own babies as I think they would have been so useful for cuddling them in and then transferring them to a moses basket, like a ready made swaddle. I used chunky yarn but two strands of contrasting DK would look good too. This cocoon fits newborn to three months.

1617375_1575143806066385_6908767790170820786_o

The pattern is in US terms.

Ch2 at the start of a row does not count as a stitch. Start round in the same stitch as the ch2, not the next one.

You need:

6mm hook, chunky yarn.

Magic ring, ch 2, 8 dc in ring, sl st into first DC to join. (8)

Row 2: Ch2, 2 dc in each stitch around (16)

Row 3: Ch2, *2 DC in first stitch, DC in next*. Repeat ** around. (24)

Row 4: Ch2, *2 DC in first stitch, DC in next 2*. Repeat ** around. (32)

Row 5: Ch2, *2 DC in first stitch, DC in next 3*. Repeat ** around. (40)

Row 6: Ch2, *2 DC in first stitch, DC in next 4*. Repeat ** around. (48)

Row 7: Ch2, *2 DC in first stitch, DC in next 5*. Repeat ** around. (56)

Row 8: Ch2, *2 DC in first stitch, DC in next 6*. Repeat ** around. (64)

Row 9: Ch2, DC in each stitch around (64)

Row 10: Ch2, *DC2tog, DC in next 6*. Repeat ** around. (56) Fasten off this colour and join new colour with a slip stitch.

Row 11: Ch2, *2 DC in first stitch, DC in next 6*. Repeat ** around. (64)

Row 12: Ch2, *2 DC in first stitch, DC in next 7*. Repeat ** around. (72)

Row 13: Ch2, DC in each stitch around (72)

Row 14: Ch2, *DC2tog, DC in next 7*. Repeat ** around. (64)

Row 15: Ch2, *DC2tog, DC in next 6*. Repeat ** around. (56).

Fasten off this colour. Join new colour with sl st. Repeat rows 11-15 twice more, alternating the colours used.

Finish off after a dec to 56 row and sc two rows, either in constrasting chunky yarn or in 2 x strands of dk. Hope you like it. Please let me know if there are any issues with the pattern!

Happy hooking x

PS the hat is a very cute pattern from Hand Me Down Hobby.

ETA Regarding the hat…

The second time I made this hat in newborn size I used stylecraft chunky and a 6mm hook. I started with 10 and increased 10 stitches each time until 30 stitches then increased in every 5th stitch to get 36 stitches in total. I did 8 rows altogether and then two rows of the rib edging.
10929042_1579689175611848_4189018688648088351_o

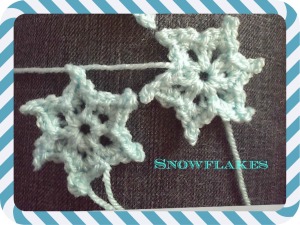
Teeny snowflake pattern

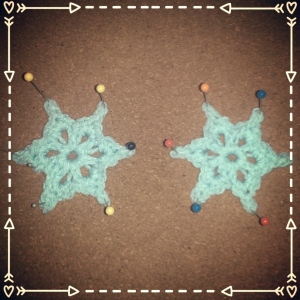
I struggled to find a small simple snowflake to add to some child size fingerless mitts so I came up with this. Just noting it down so the second snowflake matches my first!

snowflakes_1840526905516119500_o

They match!

Pattern is in US terms.

Use dk yarn and 3mm hook.

Ch4 and sl st into 1st ch to make a ring

Row 1: ch1, *sc into centre of ring, ch3* repeat ** 5 times with a slip stitch into first sc after the final ch3. There should be six ch3 loops.

Row 2: *2 sc into ch3 loop, ch3 then sc into 1st ch (picot), 2sc into loop. sl st into sc between loops on previous row.* Repeat ** 5 more times and fasten off.

I recommend blocking to fix the snowflakes in shape before appliqueing (is that a word?!)

I recommend blocking to fix the snowflakes in shape before appliqueing (is that a word?!)

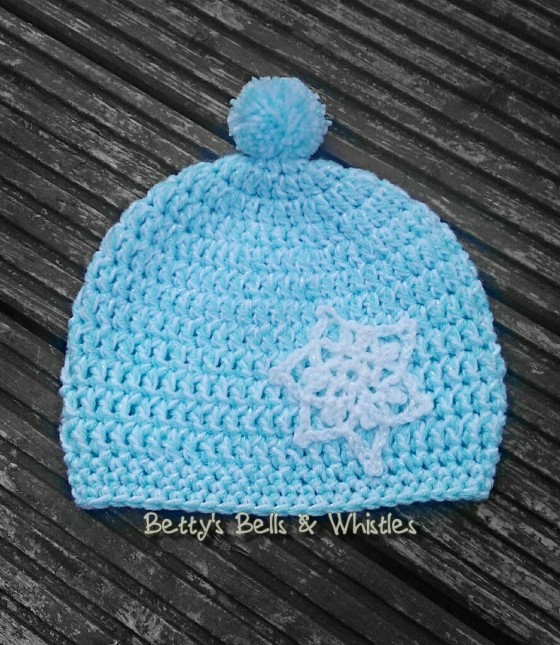
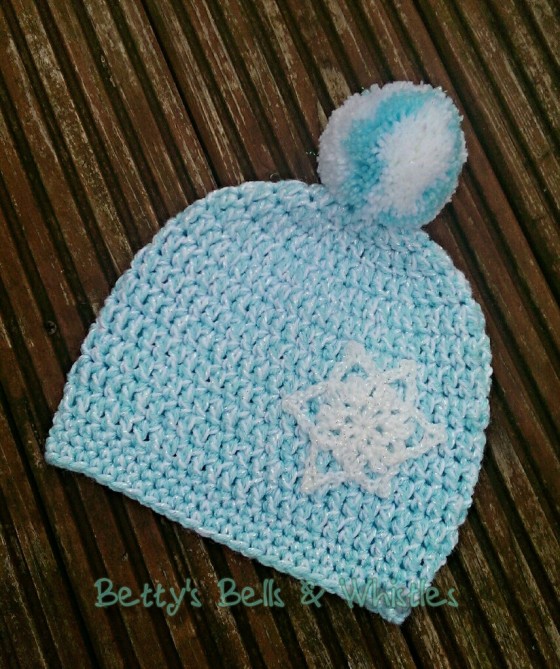
Frozen themed bobble hat

I was late to the party with regards to Frozen, I didn’t see it until the middle of summer but became slightly obsessed with the soundtrack as soon as I saw it. I also loved getting ideas for new hats and accessories and thought I would carry on with my theme of crocheting with two strands of yarn in order to make a hat that was a bit different to all the Elsa crowns and braids out there. This is a really simple hat that looks so sweet when complete.

This simple pattern makes a hat that will fit a child from approximately 3-8 years. It’s lovely and stretchy.

IMG_20140918_112720_wm

You need: 

  • DK yarn in turquoise and sparkly white. I used stylecraft special “sherbet” and James C Brett Twinkle DK in white.
  • 6mm and 5.5mm hook for hat. 4mm hook for snowflake.
  • Pom-pom maker such as this clover one. Alternatively, use good old fashioned cardboard circles. Plenty of YouTube videos to show you how.

Pattern is in US terms.

HAT

Start with 6mm hook:
Magic ring, chain 2, DC 10 in magic ring, join to first DC, ch 2
Round 2: ch 2, 2 DC in each around, join (20 DC)
Round 3: ch 2, 2 DC in first stitch, DC in next, around, join (30 DC)
Round 4: ch 2, 2 DC in first stitch, DC in next two, join (40 DC)
Round 5: ch 2, 2 DC in first stitch, DC in next three, join (50 DC)
Round 6: ch 2, 2 DC in first stitch, DC in next 9, join (55 DC)
Round 7-13: ch 2, DC in each stitch around, join (55 DC)
Round 14-16 (change to 5.5mm hook): ch1, SC in each stitch around, join, ch 1 (55 SC)
Finish off.
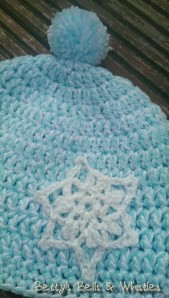
Snowflake: I used this pattern by swirls and sprinkles, the sparkly DK and a 4mm hook, and blocked using spray starch before sewing to my hat.
Pom pom: I made by wrapping both strands of yarn round the pom-pom maker at the same time.
IMG_20140918_112852_wm

image

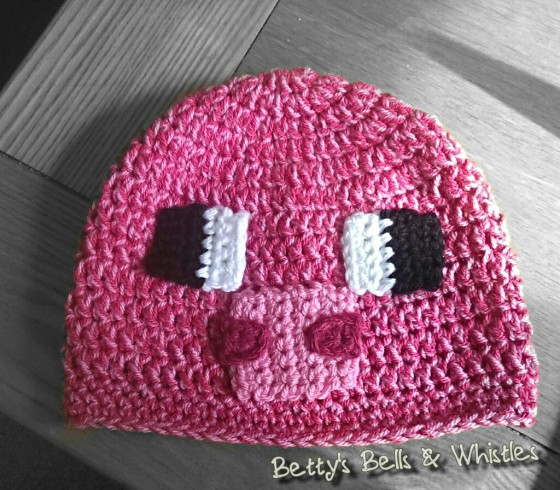
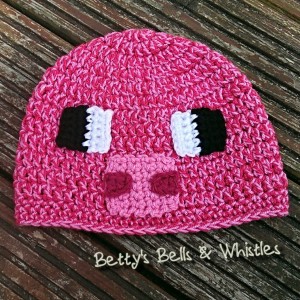
Minecraft inspired Pig hat

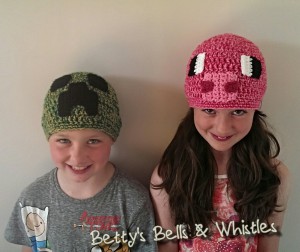
Following on from the Creeper hat, I decided to try making another Minecraft character hat. After green, pink is my favourite colour so it had to be the pig! The faces are so easy to make as the Minecraft characters are all pixellated which makes the designs nice and square. The Pig is almost as simple as the Creeper, just a couple of colour changes to consider.

This pig has a derpy face. Apparently.

I adjusted the hat pattern slightly from the Creeper hat, just to make the edge a bit more snug.

You need:

  • DK yarn in two shades of pink/red. I used Stylecraft special DK in Fondant and Pomegranate. (Approx 35g of each)
  • Chunky yarn in pink (I used Stylecraft chunky in fondant but you could double up the DK yarn)
  • Chunky yarn in dark pink (or again, double up the darker DK you used)
  • Black chunky yarn (scraps)
  • White chunky yarn (scraps)
  • 5mm hook (for face)
  • 6mm hook (for hat)
  • 5.5mm hook (for hat edge)

I use US crochet terminology.

HAT
Start with 6mm hook:
Magic ring, chain 2, DC 10 in magic ring, join to first DC, ch 2
Round 2: ch 2, 2 DC in each around, join (20 DC)
Round 3: ch 2, 2 DC in first stitch, DC in next, around, join (30 DC)
Round 4: ch 2, 2 DC in first stitch, DC in next two, join (40 DC)
Round 5: ch 2, 2 DC in first stitch, DC in next three, join (50 DC)
Round 6: ch 2, 2 DC in first stitch, DC in next 9, join (55 DC)
Round 7-13: ch 2, DC in each stitch around, join (55 DC)
Round 14-17 (change to 5.5mm hook): ch1, SC in each stitch around, join, ch 1 (55 SC)
Finish off.
PIG FACE:
Eyes – make two (In chunky black using 5mm hook):
ch6
Row1: SC in 2nd chain from hook and in next 4 chains. Ch1, turn. (5 SC)
Row 2: SC in each stitch. Ch1, turn.
Row 3: SC in each stitch. Change to white chunky yarn. Ch1, turn.
Row 4-5: SC in each stitch, Ch1, turn.
Row 6: SC in each stitch, fasten off.
Snout (light pink chunky and 5mm hook):
Ch7
Row 1: SC in 2nd ch from hook and in next 5 st. Ch1, turn. (6 SC)
Row 2-7: SC in each stitch. Ch1, turn.
Row 8: SC in each stitch. Fasten off. (6 SC)
Nostrils – make two (In dark pink chunky using 5mm hook):
Ch4
Row 1: HDC in 3rd ch from hook and in next ch. Fasten off. (2 HDC)
Tie in the ends and position the face pieces on the hat as shown in the picture. Stitch the nostrils to the snout before sewing the snout on. Pin the eyes in place and sew on the hat.
IMG_20140808_064910_wm
IMG_20140808_064654_wm

Minecraft creeper inspired hat pattern

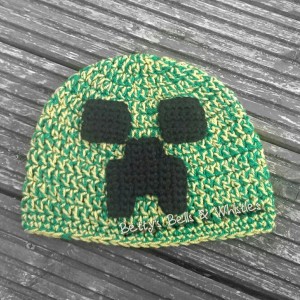
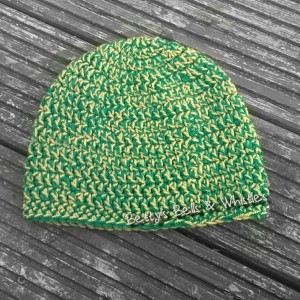
I have a Minecraft obsessed 9 year old boy who requested I make him a creeper hat so this is what I came up with: IMG_20140806_071725_wm In order to get the different green tones, I used two strands of stylecraft special dk in different shades of green. For these hats it was “Lime” and “Green”. I’m planning on using “meadow” and “khaki” next :-). Alternatively you could use a chunky green yarn. You need:
  • DK yarn in two shades of green (Approx 35g of each)
  • Black chunky yarn
  • 5mm hook (for face)
  • 6mm hook (for hat)
  • 5.5mm hook (for hat edge)

I use US crochet terms.

Magic ring, chain 2, DC 10 in magic ring, join to first DC, ch 2
Round 2: ch 2, 2 DC in each around, join (20 DC)
Round 3: ch 2, 2 DC in first stitch, DC in next, around, join (30 DC)
Round 4: ch 2, 2 DC in first stitch, DC in next two, join (40 DC)
Round 5: ch 2, 2 DC in first stitch, DC in next three, join (50 DC)
Round 6: ch 2, 2 DC in first stitch, DC in next 9, join (55 DC)
Round 7-14: ch 2, DC in each stitch around, join (55 DC)
Round 15-16 change to 5.5mm hook: ch1, SC in each stitch around, join, ch 1 (55 SC)
This pattern was adapted from Repeat Crafter Me’s polar bear hat with some changes to make it a beanie rather than an earflap hat.
Finish off.
 IMG_20140806_074425_wm


Creeper face

I came up with the creeper face myself! This is the first time I have written my own instructions so any feedback would be appreciated.

Use chunky black yarn and a 5mm hook. Turn at the end of each row. The Ch 1 at the start of each row is your turning chain and is not included in stitch counts.

Creeper eyes (make two):

Ch7

Row 1: sc in 2nd chain from hook and in each chain across, ch1 turn (6 sc).

Rows 2-5: sc in each stitch across, ch1, turn (6 sc)

Row 6: sc across, finish off (6 sc)

Creeper mouth:

Ch 8 Row 1: sc in 2nd ch from hook and in next 6, ch1, turn (7 sc)

Row 2-3 : sc in each stitch across, ch1, turn (7 sc)

Row 4: sc in 7 stitches, ch4, turn (7sc, 4ch)

Row 5: sc in 2nd ch from hook and in next two chains. Sc across the next 4 stitches, ch1, turn (7 sc)

Row 6-7: sc across, ch1, turn (7 sc)

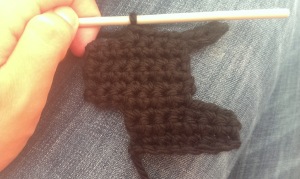
Row 8: ch1, sc in 7 stitches then ch4, turn (7 sc, 4 ch)

Row 9: sc in 2nd ch from hook and in next 2 chains, Sc in next 4 stitches, ch1, turn (7 sc)

Row 10-12 : sc across (7 sc) Finish off.

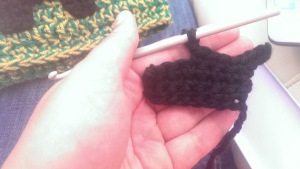
IMAG2652_1

This is what you should have at the end of row 4.

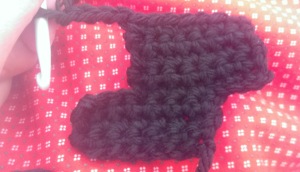
IMAG2653_1

This is the end of row 8.

IMAG2655_2

When you’ve turned your work and completed row 9, this is what you should have.

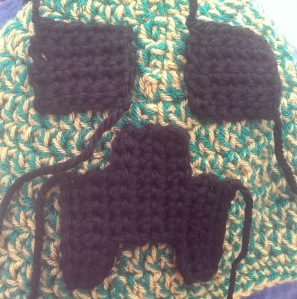
I pinned the pieces into place and sewed on with a needle and thread. IMAG2656_1 IMG_20140806_071725_wm Hope you enjoyed making your creeper hat!

My favourite free crochet patterns

I am eternally grateful to all the lovely pattern designers who have provided over 48,000 free crochet patterns on Ravelry. This meant I could start crocheting with very little financial investment, a couple of pounds for a hook and some yarn. Many of these designers also have YouTube channels dedicated to teaching the basics of crochet and I am yet to come across a stitch that I haven’t been able to learn via YouTube!

(If you decide to learn via YouTube…be aware that most videos use US crochet terminology. See my previous blog post).

These are a few of my favourite free patterns so far…

The owl hat from Repeat Crafter Me. I started off by making one for my toddler and one for my unborn baby at the end of last summer. I was kept busy making owl hats for a good couple of months!

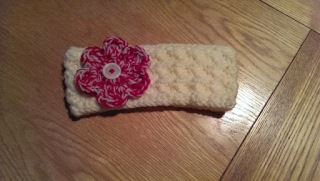
This headband is so pretty. I made one for my daughter and this one was made for an order. It was quick to make and I love the flower on it.

One of my favourite hats yet! This cloche style hat from Aesthetic Nest  has a great tutorial to accompany the pattern and the flower pattern is included. Another fab flower!

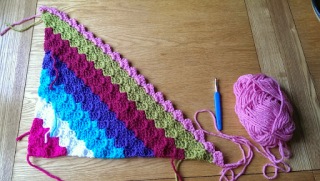
My first crocheted blanket. This is a corner to corner afghan blanket. There are many patterns for these online but I used this one from Red Heart. Corner to corner patterns are fab because you just carry on until it’s the size you want and then start reducing the length of the rows. This makes it feel like it works up really quickly!

One of my absolute favourites. This gorgeous cardigan is a free pattern from the amazing Moogly blog. I’ve almost finished it so will share a pic when it’s complete, but so far, it looks perfect.

I sourced most of the patterns via Ravelry, a site that is well worth joining if you are looking for crochet or knitting patterns. There are over 130,000 free patterns to choose from!


Edited to add…
I’ve now finished the Moogly cardigan! It looks so lovely and worked up very neatly. It’s a pretty easy pattern to follow. Go on, give it a go…